Debian Linux HowTo: Bridging WLAN to Ethernet for Access Point (Infrastructure Mode) for Android Phones
Many mobile devices, such as Android, unfortunately will NOT connect to an Ad-Hoc WiWi network, for reasons which are very well explained on this How-To Geek posting:
Many devices don’t support ad-hoc mode because of its limitations. Android devices, wireless printers, Google’s Chromecast, and a wide variety of other Wi-Fi-enabled devices don’t want to deal with the problems of ad-hoc networks and will refuse to connect to them, only connecting to networks in infrastructure mode.
There are basically 2 modes to operate a wireless network: “Ad-Hoc” and “Infrastructure” (the latter one also called “Access Point” or shorter “AP”) mode. Cheaper Wireless cards only support the Ad-Hoc mode, but do not support the AP mode.
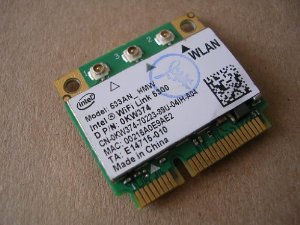
So, I thought: Let’s just buy a WLAN card which supports the AP mode. I bought the Intel Centrino Advanced-N 6235 (Link to official Intel product page).
It is supported since Kernel version 3.2. I mounted it, and was planning to use the Network Manager of Debian Wheezy / Gnome 3 to quickly set up an AP Hotspot.
Easier said than done! Because even though there is an option to set “Infrastructure” mode, my Android phone still would not connect. It would simply write “Ad-Hoc Connecting” and stop there.
After researching, it turned out that you need a dedicated user-space program for ‘driving’ the AP hardware contained in your network chip; it is called hostapd. It seems, you can’t do without it to solve this problem.
I found this blog which offered a bash script to automate the job, but it only worked for Ubuntu, and not for Debian due to different configuration files. I also found this little Qt program that made the wireless connection work for my phone, but disconnected my laptop from all networks. (It could have been my fault due to not understanding the issue enough, though…)
This blog did a good job in explaining what hostapd is and gives basic installation and configuration instructions. You should read the post in any event. However, the suggested final solution did not work for me. Yes, the phone would see the generated wireless network, would connect, but immediately disconnect. I have not found the reason for the failure, but it probably lies hidden in the complexity of the set-up which involves
- a locally run DHCP and DNS server,
- configuration of same,
- and manual calls to iptables (masquerading, forwarding, etc.) to route between eth0 and wlan0 devices
The author of this blog wrote a second post to avoid the locally run DHCP server in favor of re-using the DHCP server of the network (e.g. the modem) by using dnsmasq , which is yet another locally run server, only a bit simpler, but has to be configured also. I tried it to no avail. Same problem: phone would disconnect immediately.
Frustrated, I moved on.
Then I found this blog which brought up a new idea: the concept of bridging between network interfaces instead of iptables forwarding, which — and this is the good news — is supported ‘natively’ by hostapd and the Linux networking configured by /etc/network/interfaces.
However, this solution still did not work for me. After modifying /etc/network/interfaces accordingly, I managed to mess my internet connection up. Setting up a bridge between Ethernet and Wireless is not that trivial! Even the official Debian Wiki BridgeNetworkConnections would not give working results for my case.
So, I started crossreferencing between other solutions and finally came up with the following sequence of commands that worked for me on my pretty standard Debian Wheezy laptop with one ethernet adapter (eth0) and the above mentioned Intel network adapter (wlan1).
You only need to install 2 packages (bridge-utils and hostapd). With my method, there is no need for a locally installed DHCP or DNS server, and no need to modify the /etc/network/interfaces file. There is no requirement to permanently make changes to your network configuration. In an emergency (if you are stuck somehow), a reboot will reset your network configuration to the defaults. Devices connected to your newly created wireless network will be served by the DHCP and DNS server specified in your router/modem. Your mobile phone will be a regular and equal member of your LAN.
apt-get install bridge-utils
Next, remove the attached IP address from the Ethernet card eth0. Bridging will not work when an IP address is set.
ip addr flush dev eth0
Next, turn on IPv4 networking for your wireless card. This is necessary, otherwise one of the next steps will give the error “can’t add wlan1 to bridge br0: Operation not supported”.
iw dev wlan1 set 4addr on
Next, create the actual bridge br0 with the helper program brctl:
brctl addbr br0
Next, add a bridge between Ethernet and wireless. The order of the last two arguments is not important:
brctl addif br0 eth0 wlan1
Next, bring the newly created bridge up, as a virtual device:
ip link set dev br0 up
At this point, you will have lost your connection to your LAN/WAN. You have to set an IP address, netmask, router, etc. for the bridge. We do this via DHCP:
dhclient br0
Now you should be able to access the internet again.
So far so good. Now we have to create our actual wireless network in AP mode and use our Android phone to test it. Install hostapd:
apt-get install hostapd
Create a configuration file somewhere; I chose the location /etc/hostapd/my-wlan.conf . Make sure you have the right driver enabled for your card (see above mentioned blog for more info. n180211 should work in most cases):
interface=wlan1
driver=nl80211
wmm_enabled=0
ssid=mynetwork
channel=6
bridge=br0

#sets the mode of wifi, depends upon the devices you will be using. It can be a,b,g,n. Setting to g ensures backward compatibility.
hw_mode=g

#macaddr_acl sets options for mac address filtering. 0 means "accept unless in deny list"
macaddr_acl=0

#setting ignore_broadcast_ssid to 1 will disable the broadcasting of ssid
ignore_broadcast_ssid=0

#Sets authentication algorithm
#1 - only open system authentication
#2 - both open system authentication and shared key authentication
auth_algs=1

######Sets WPA and WPA2 authentication#####
#wpa option sets which wpa implementation to use
#1 - wpa only
#2 - wpa2 only
#3 - both
wpa=3

#sets wpa passphrase required by the clients to authenticate themselves on the network
wpa_passphrase=hackme

#sets wpa key management
wpa_key_mgmt=WPA-PSK

#sets encryption used by WPA
wpa_pairwise=TKIP

#sets encryption used by WPA2
rsn_pairwise=CCMP
(comments are thanks to above mentioned blog)
Now, start hostapd with this configuration file as the only argument:
hostapd /etc/hostapd/my-wlan.conf
Now take your Android phone, enable WIFI, wait for the network mynetwork to appear, connect to it, enter the password “hackme”, open up a browser and see if it works. Make sure that Wireless is turned on in your Network Manager:
Otherwise you will get the following messages:
rfkill: WLAN soft blocked
Could not set interface mon.wlan1 flags: Operation not possible due to RF-kill
nl80211: Failed to set interface wlan1 into AP mode
To roll back everything, we can do:
ifconfig br0 down
brctl delbr br0
ifconfig eth0 down
ifconfig eth0 up
Only after that, we can turn of Wireless in Network Manager.